Well, here goes with the USS Enterprise 1701-C by Clever Santoro. As always I'm starting with the upper saucer:-

I've printed this design twice so that I have a template for cutting
damage sections to underlay before fitting everything together - I found
this to be quite effective for fairly minor surface damage when I built
my USS Constellation.

For the damage I used a marker for the hull breaches then cut through
and glued a damage printout to the underside. The scorch marks are made
with a black pencil. I was hoping that the marker would leach through
from the back, but (of course!) it didn't. When the underside of the
saucer was joined I did the same for it:-

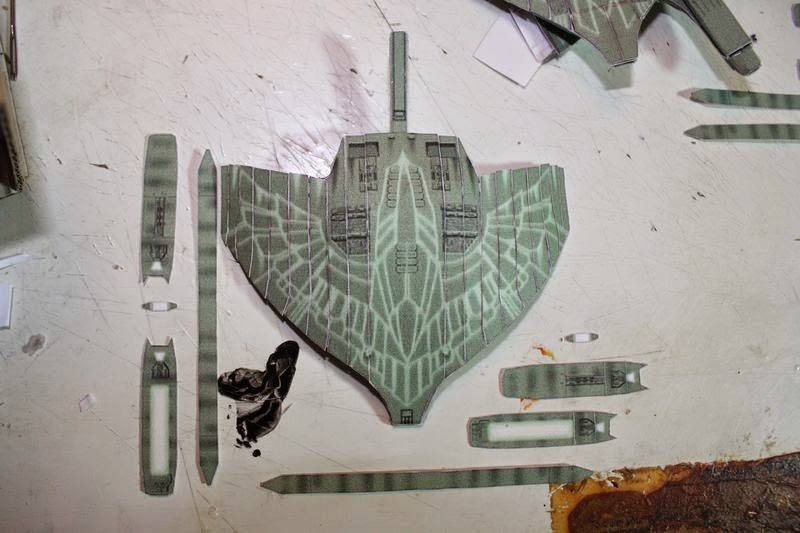
and then moved on to the nacelle struts and secondary hull.
This is where progress almost grinds to a halt due to mega-fiddly parts:-

I'm almost done with the Ent C - just a bit a blackening left to do on the nacelles:-

Due to the insets, I've decided against insetting the battle damage on
the nacelles as it would've made an already complicated build
practically impossible to construct. Zooming in on the photo also shows
fairly slight misalignments as huge gaping holes! lol The actual model
is just over 2" in length so that massive crack is barely noticeable.
I'm trying an experiment this time around. I tried to build a cloaked bird of prey, but
gave up in disgust because my superglue turned out to be crapglue. I
gave the glue another chance on a warbird with the same result so I'm
using tape now. If it looks passable I'll stick (no pun intended!) with
it.
Skip's design is a very much simplified one so I'll use it as a guide. By taping the template to the back of the plastic I get the lines to score and the outline to cut round. Here's the head as an example:-
Skip's design is a very much simplified one so I'll use it as a guide. By taping the template to the back of the plastic I get the lines to score and the outline to cut round. Here's the head as an example:-

This design has a slightly different shape to Zosho's and I'm doing
quite a bit of trimming to keep this one in line with the decloaked
warbirds. It might need some reworking at the back, but this should be
easy enough since I don't have to worry about texturing. The head and
upper wing look like this:-

The cloaked warbird is finished. Using tape hasn't detracted too much
from the model; it's probably better than the result I would get by
using superglue. The size and shape are close enough to Zosho's that any
discrepancy can be put down to the optical distortion of the cloak -
that's my excuse and I'm sticking to it!

I've made a start on the backdrop. I pinched three starscapes from
interwebland and for Narendra III I used the Venus Magellan globe from
the USGS website:-

Extra detailing provides a bit of cloud cover, as well as smoke coming from the
remains of the outpost. I've also placed a flickering yellow LED in a
cone inside the globe.It might have been a better idea to do this before gluing the globe to the backdrop!") For the clouds I just pulled some cotton wool so that it was really
thin, then I attached it to the right angled edge of some clear packing
from a flash drive:-
For the clouds I just pulled some cotton wool so that it was really
thin, then I attached it to the right angled edge of some clear packing
from a flash drive:-

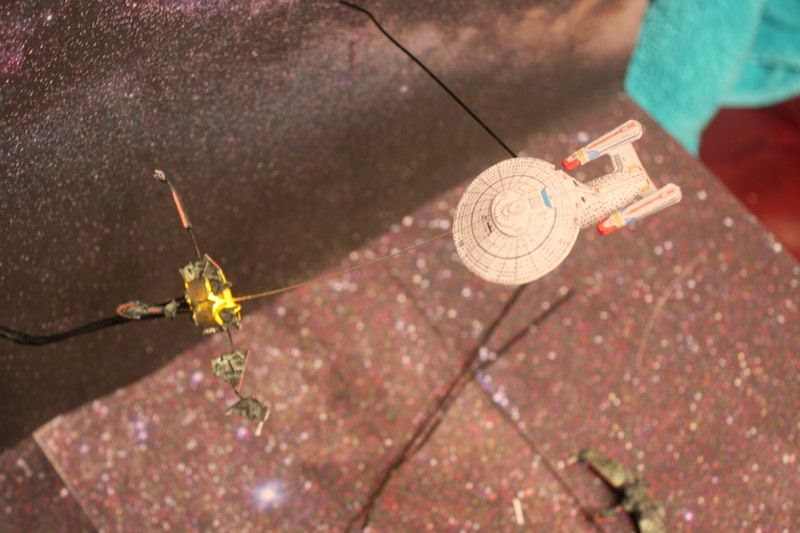
I cut a hole slightly larger than the Ent-C in a sheet of card after
attaching a starscape to both sides. I then cut five more holes large
enough to hold blue LED's and wired them through the back of the box
before gluing on various thicknesses of cotton wool and attaching one
side of the partition. This is the Ent-C leaving TNG time:-

and emerging in it's own time:-

So far I've mounted one warbird. I had to cut into it's head to mount a
green LED and bore a hole through the front for a fibre optic filament.
More work needs to be done on the filament as it still isn't glowing
properly.

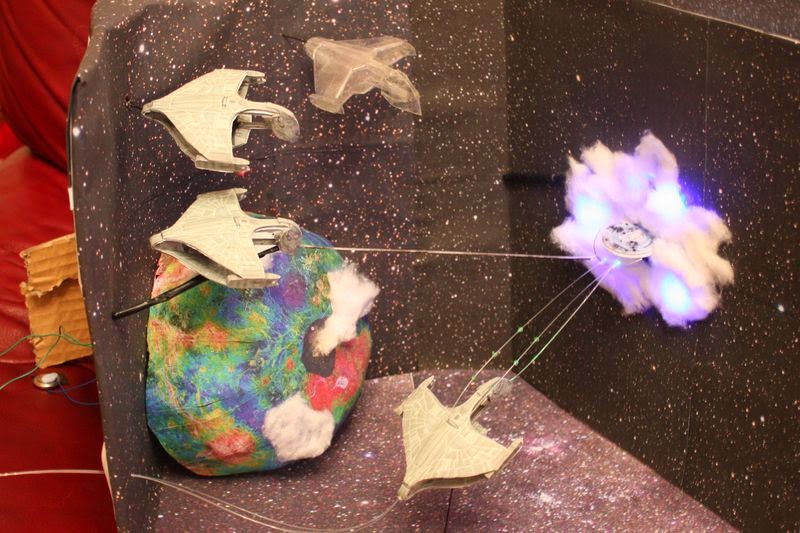
And the Enterprise-C is immediately under attack:-

I've added a shield to the Ent-C:-

I found a handy piece of plastic packing with a good shape,punched a
hole in it for the fibre optic filament to hold it in place and used a
dab of PVA for stability. I then mounted the other warbird from "The
Defector" and the cloaked warbird:-

I still need to build the fourth warbird and it'll be mounted more centrally. I reckon I'll have the last one firing torpedoes.
On the other side the Ent-D and a bop have been mounted:-
So Scotty said, "Ye cannae break the laws of physics,Captain!" Who cannae?!? lol The phaser fibre optic will be straight once the PVA dries and I pull everything into position. Here's another from above:-
A yellow LED mounted inside the bop body doubles as an explosion and a light source for the phaser:-

There's a bit of difference in the building of the last warbird compared to the build outlined in the "The Defector" post...
I've punched holes through the location of the torpedo launchers:-
I've punched holes through the location of the torpedo launchers:-

and through the layer beneath. I then threaded fibre optic filaments (of
enough length to reach the LED at the rear of the box) through these
holes so that they'll project from the rear of the ship:-

The upper wing was completed with two filaments for torpedoes and one for the front disruptor threaded through:-

I punched a hole through the top of the head and cut a notch where the filament should exit at the front:-

Meanwhile, in the TNG time, I've mounted the other two bop's and added
filaments to them which I've threaded through the Ent-D's shield and out
the back of the box. These are a couple of preliminary pics - the
filaments still have to be tightened and blackened from the shield to
the box wall:-


A very slight transverse scrape with sandpaper is enough to turn the
filaments into a beam. For the torpedoes I glued 2mm green, bicone beads
over nicks in the filament.
The fibre optics get sent to me in a coil and straightening them is a nightmare! I've done what I can and this is the result:-

The shield is a section taken from the packing of an Asterix The Gaul
flash drive. I didn't want to stick the fibre optics to welding rods
with these really small birds of prey because-
1. they'd be really obvious
2. their weight drags everything out of position and
3. there was no way for me to glue them in situ.
Here's the TNG era scene again from a different angle:-
1. they'd be really obvious
2. their weight drags everything out of position and
3. there was no way for me to glue them in situ.
Here's the TNG era scene again from a different angle:-

and a bit better focused.
And finally, the Ent-C returning to Narendra III:-
This one takes a total of six
lithium cells to power all the LEDs. I suppose I could've used the mains
adapter from the Wolf 359 diorama, but that would've needed a lot more
wire than I have available at the mo'.