Now that I have a backdrop for the diorama it's time to move onto the Borg cube. There's
one face of the cube which has more going on in it than the others
so I'll show the log for it. Most of the Federation/Klingon fire seems
to be concentrated in one place and I've cut out a large hole for this:-
I also cut smaller areas which are black on the surface to try to
have a more 3D effect. With the other sides I just stuck a black square
to the back, but I used smaller black sections with this face. Ssince the
cube will be the main load-bearing component so I've glued balsa strips around the edges for stability and more will be added to hold batteries, switches, etc. An
additional 'frame' was built up on the back to give three depths of damage from
phaser fire.
An additional layer with darker sections removed was added, again in an attempt to give additional depth. I was going to add more layers to bring
out the lighter areas, but I have neither the time nor the inclination to put in so much effort for an effect which is actually almost negligible with
200gsm card:-
Spot the difference? No, me neither! Instead I'll concentrate on areas which draw the eye to them and have more going on.
I've used a production photo of the Enterprise A which had extensive
damage, and moulded this into the three layers of the hole. The rim was
then blackened with a marker pen. A
nest of wire wool has been glued in the deepest part of the hole with a huge glob (very
technical term) of PVA which I'm leaving to dry overnight before I cut
and sculpt filaments. I have some other ideas for this area - watch this space ;-).
More of my stock of balsa has been assimilated today:-
I've been building the frame inside the cube as I add more faces.
Additional beams will be required to mount it and for holding
batteries. The main damage hole has been completed. I pulled out
filaments of the wire wool then added paint graded from red to yellow.
As a finishing touch I cut out some very small pieces, blackened the
backs and glued them around the hole to give an additional feeling of
debris being blasted out.
For the top I've done what I should have done with the other faces if I'd
had a larger supply of thick card. I glued a face onto 1mm thick card
then cut out some black sections and stuck all this onto a completely
black sheet. I glued another face to 2mm thick card, removed the darker
sections and small areas where black bits had been removed on layer 1
and joined them. Finally I edged some of the offcuts from the second
layer and glued them on. The result is much more three dimensional:-


Before joining the faces I also punched small holes through most of the
green areas with a darning needle; these were needed to thread through
fibre optic filaments from a green LED/fibre optic hair extension kit.
When the filaments were through the needle holes I placed a glob of PVA
around the inside to hold them in place and clipped the outer end flush
to the face. I was going to use 0.25mm fibre optic filaments for Borg
fire, but it was too thin to stand up to either sanding or scraping with
even a fingernail. Hopefully 1mm filament will be more successful - otherwise it's back to the drawing board
and a crash course in how to turn LEDs into beams. The result so far is
this:-
So the cube is now in spacedock until I get the additional parts
delivered. Which reminds me - I'll need a blue LED for the Borg tractor
beam...


 .
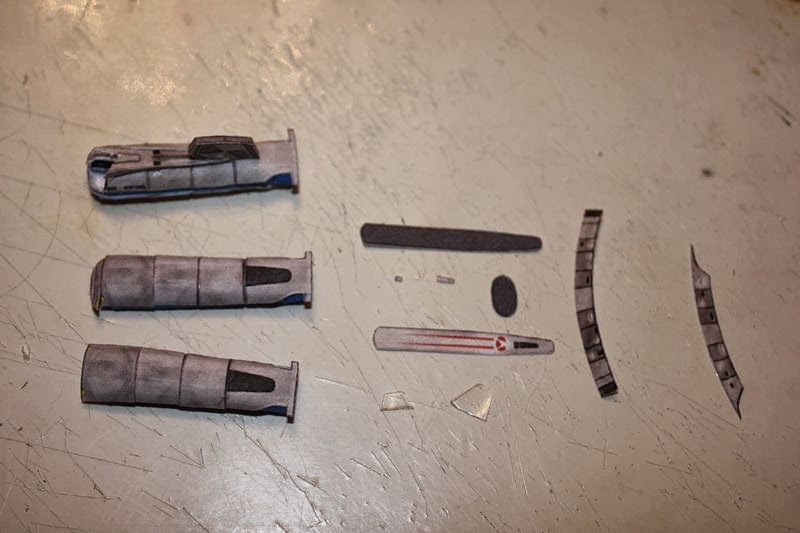
I never did like the Excelsior class and the only reason I picked it
for the USS Melbourne was to avoid having two Nebulas/Nebulae. I've
cobbled together a passable approximation (good enough for my purposes)
using parts from the USS Enterprise B kit and fiercely trimmed parts from the USS
Excelsior kit which I printed slightly too big. I also had to edit the USS Excelsior parts to bring the
colouring closer to the Enterprise by zapping the gamma saturation a few
times in XnView. There are no more build log photos, just a few end results:-
.
I never did like the Excelsior class and the only reason I picked it
for the USS Melbourne was to avoid having two Nebulas/Nebulae. I've
cobbled together a passable approximation (good enough for my purposes)
using parts from the USS Enterprise B kit and fiercely trimmed parts from the USS
Excelsior kit which I printed slightly too big. I also had to edit the USS Excelsior parts to bring the
colouring closer to the Enterprise by zapping the gamma saturation a few
times in XnView. There are no more build log photos, just a few end results:-


